
While small-scale email campaigns can be sent from Gmail, email quickly becomes unmanageable as you start scaling your business. For example, you might have several different types of emails you want to send your customers or business partners, including newsletters, reminders, support issue tickets, promotional messages, and more.
This added complexity can make emails very difficult to manage without the necessary infrastructure. This is where Amazon Simple Email Service (SES) comes in. Amazon SES is a cloud-based email platform designed for business communication, email campaigns, transaction emails, and any other email activity, whether internal or external.
In this Amazon SES tutorial, we will guide you through the steps to create your Amazon SES account and fully set it up so you are ready to start sending emails in large volumes. Note that the images and instructions in this article follow the new Amazon SES console.
Creating an Amazon AWS account
To start using Amazon SES, the first thing you need to do is to create an AWS account. Below is a setup step-by-step:
- From your browser, head to https://aws.amazon.com/ses.
- Next, click the orange Get started with Amazon Simple Email Service.
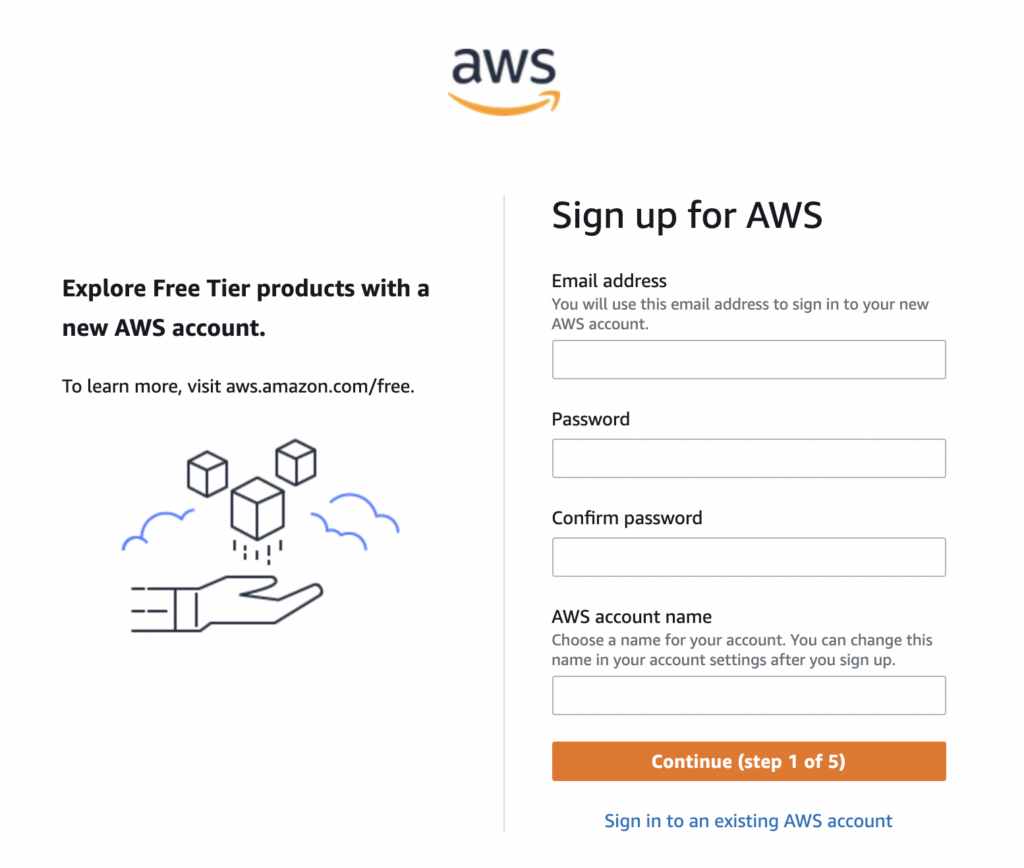
- In the following page, complete the 5 step signup process. You will need to enter your email address, choose a password, decide on your AWS account name, select your region, address, and more. Additionally, you’ll have to answer questions like “How do you plan to use AWS?” (Business/personal).
- Once you’ve created your account, you can log into the Management Console.
Now that you have created an AWS account, it’s time to start setting up your SES account. From the Amazon AWS console, go to All services > Business Applications > Amazon Simple Email Services to access the SES console.
Verifying email addresses in SES
Before sending your first emails through Amazon SES, you need to prove to Amazon SES that you are the owner of the email address(es) you intend to send emails from. In this article, we will focus on verifying individual email addresses, but you could also verify a domain.
Verifying your email addresses is a somewhat involved process because of the requirements around case-sensitivity and region endpoints, so you can save yourself a lot of extra work by paying close attention to this next section. Here’s what you need to know about verification.
Verifying an Email Address in the Amazon SES Console
1. Sign in to the AWS Management Console.
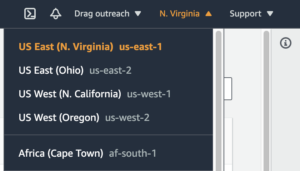
2. Choose the AWS Region for the email address you want to verify.
3. Select Configuration from the sidebar and choose Verified identities.
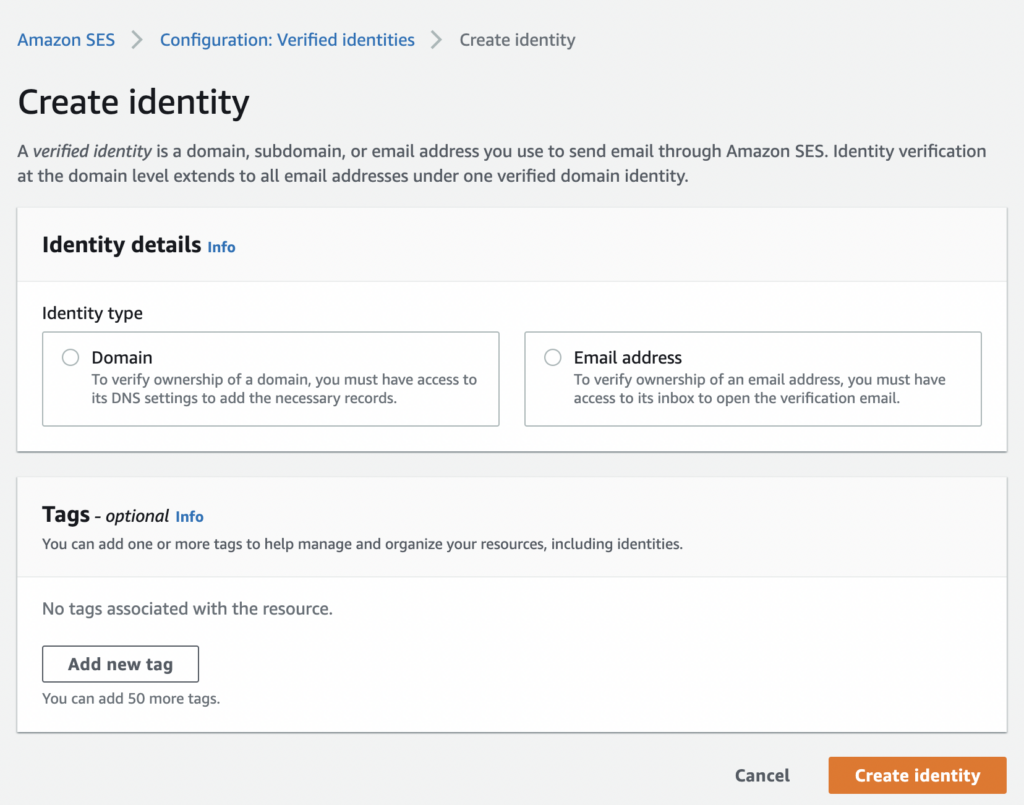
4. Click on Create identity and select if you want to verify a domain or an individual email address.
5. You will get an email from the Amazon SES team to verify your email. Check the inbox for the email address that you are verifying and click the verification link in the email.
6. Back in the Amazon SES Console, in the configuration >verified identities option, you should see “verified” under the Status column if you have successfully verified your email address.
Verifying an Email Address in the Amazon SES API
Alternatively, you can verify an email address using Amazon SES API. To do this, you first install and configure the AWS CLI. If you’ve already done this, you can follow the below steps:
- Copy the following text into the command line: “aws ses verify-email-identity –email-address sender@example.com,” replacing sender@example with your chosen email address.
- Next, copy “aws sesv2 create-email-identity –email-identity sender@example.com” into the command line, again replacing the placeholder email address with the one you want to verify.
- Check your inbox and follow the link to complete the verification steps.
Things You Need to Know About Amazon SES Verification:
- Email addresses are case-sensitive. So, for example, if you verify communications@EXAMPLE.com, you can’t send an email from communications@example.com without first verifying the latter.
- The verification status for each email address is tied to the AWS Region. Therefore, if you want to send an email from the same identity but in a different region, you must verify all regions.
Authenticating your email accounts
You have verified your email accounts, which is great. But until they are authenticated, your emails may not reach the inbox of the recipients. Make sure you set up SPF, DKIM and DMARC in your Amazon SES account correctly for your accounts before starting to send emails out.
Sending a test email
Sending emails with Amazon SES is very easy. When you first complete the AWS SES setup, your account is in a test environment called the sandbox. This means you are limited to sending up to 200 emails a day, among other restrictions (detailed below in this article).
The first thing you’ll want to do after setting up your account is to send a test email:
- Navigate to the list of identities under Configuration > Verified Identities. Select the email address with which you would like to send a test email (it must be verified) and select Send a Test Email.

- Choose between the two formats – Formatted (for simple messages) or Raw (more complex emails that involve HTML scripts).
- Fill out the rest of the fields and click send.
- Check your inbox to see if the test was successful!
Moving out of Amazon SES sandbox
Lastly, you need to pass the review process to make it out of the Amazon SES sandbox.
What is Amazon SES sandbox?
To help prevent fraud and abuse, Amazon places all the new Amazon SES accounts into what they call the sandbox. While you are in the sandbox, you have access to all Amazon SES features, but you can only send:
- Emails to verified email addresses and domains (or to the Amazon SES mailbox simulator);
- Up to 200 emails a day;
- No more than 1 email per second.
Requesting to be removed from the Amazon SES sandbox
When you are ready, you can request to leave the Amazon SES sandbox and have those restrictions lifted. Here’s how to do it:
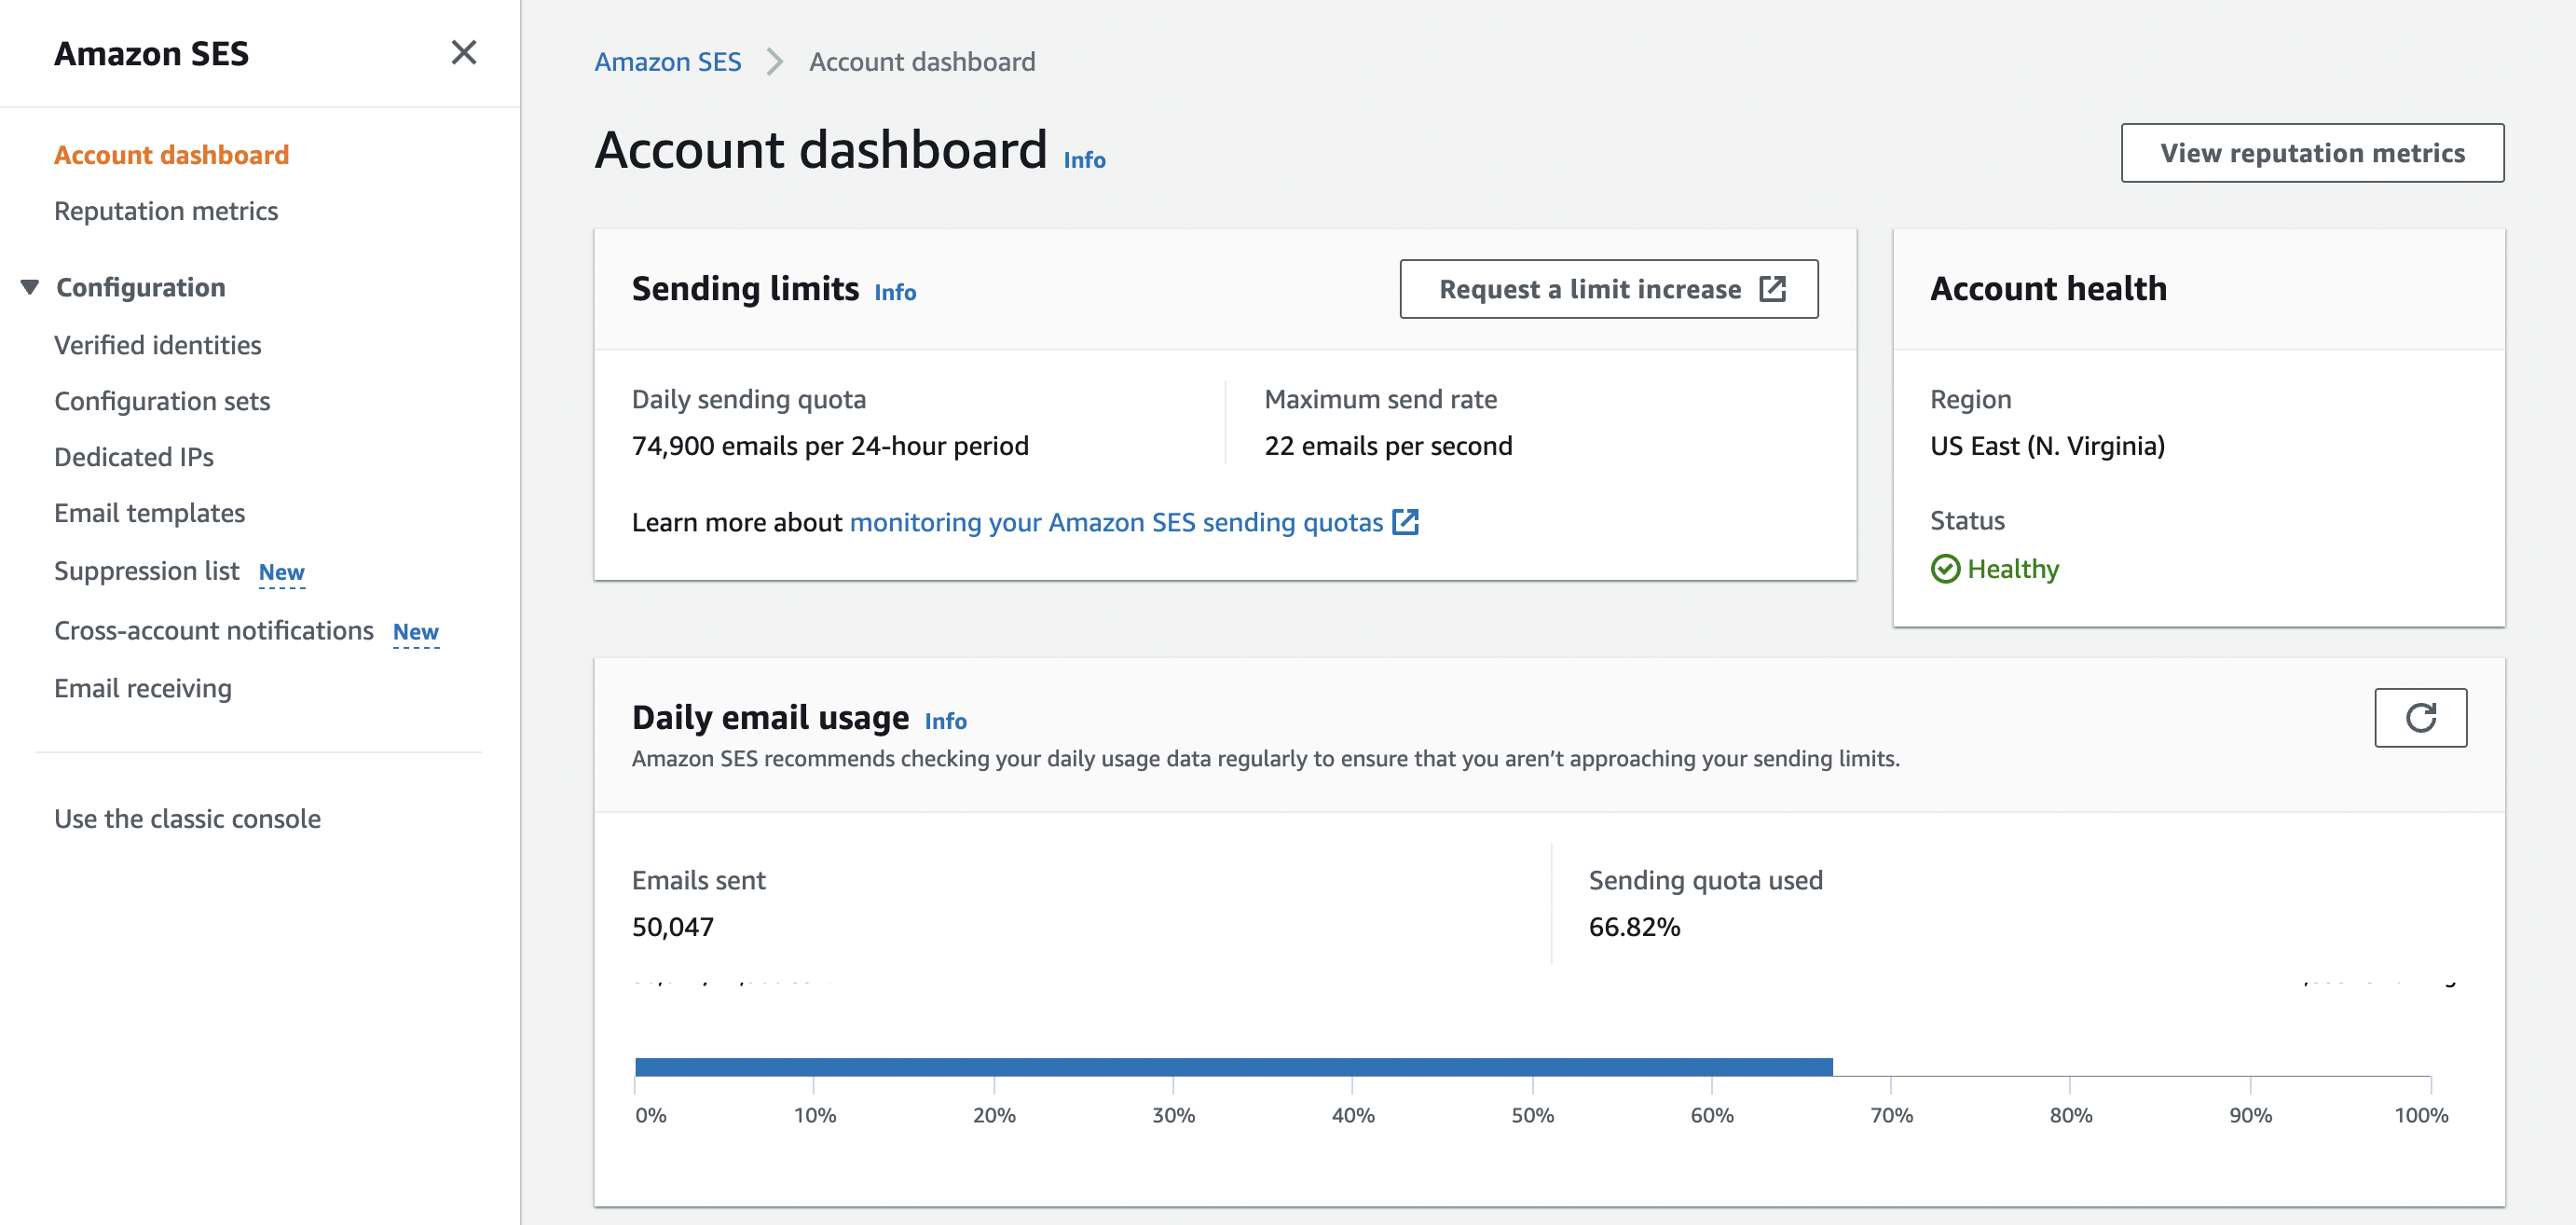
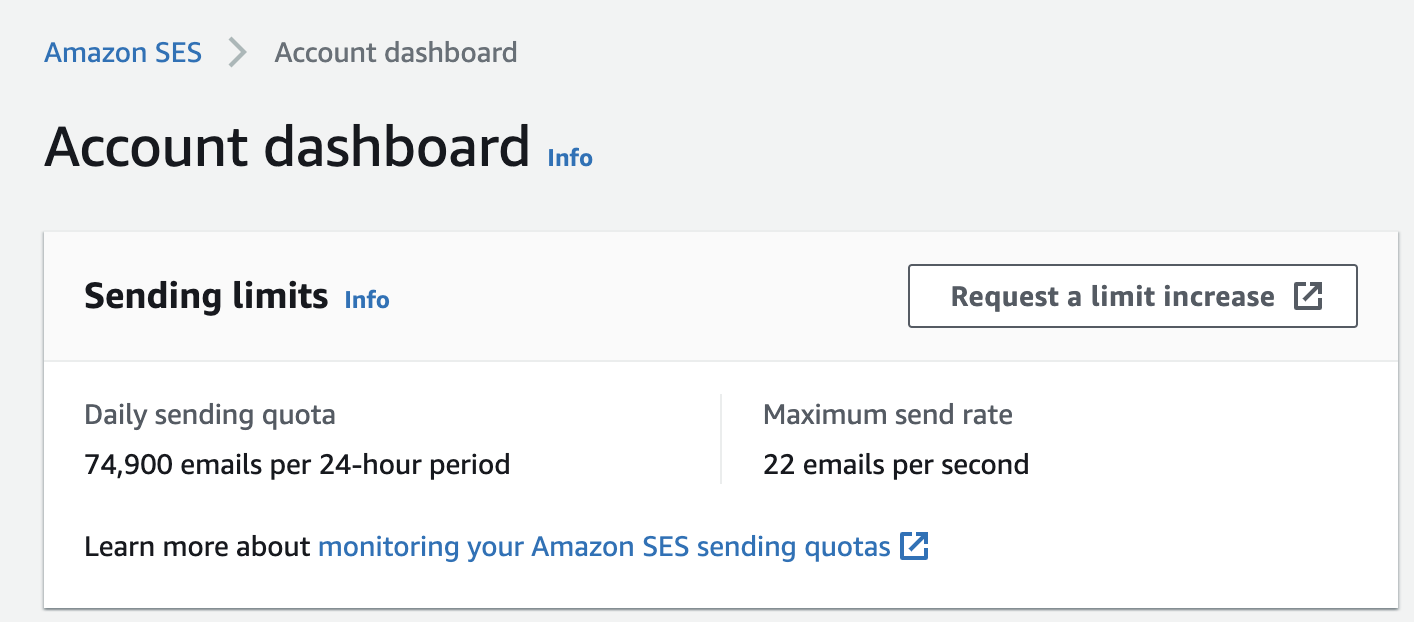
- Go to the Amazon SES console
- Click on account dashboard > sending limits > request a limit increase
3. Fill out the form with your account details. You will be prompted to specify what you are looking to use Amazon SES for, how do you plan to build or acquire your mailing lists, among other information.
The AWS team will review your application carefully and provide a confirmation (or request for further information) within 24 hours.
Using the Amazon SES console
You have gone through the basic AWS SES setup and have your account in production, congrats! Now, it’s time to start using your new account, primarily through the Amazon SES console.
In 2021, Amazon launched a redesigned AWS SES console. At the moment, users are still able to choose between the old and new designs. However, we are writing this article based on the new design only.
This is how it looks:
In summary, these are the options in the main menu:
- Account dashboard: here you can get fast access to sending limits and restrictions, sending usage, overall account health, or SMTP settings.
- Reputation metrics: here you can monitor the bounces and complaint rates of your emails. It will help you keep a good email sender reputation.
- Verified identities: here you can manage, verify or authenticate your sender identities (domains or email addresses).
- Configuration sets: Configuration sets are are groups of rules that you can apply to the emails you send using Amazon SES. For example to send information about deliveries, clicks, opens, or bounces of your emails to other AWS services.
- Dedicated IPs: this option is just relevant for Amazon SES customers that opt for having dedicated IPs (which is not the default setting).
- Email templates: here’s where you can manage your existing email templates. Note, though, that you can only create email templates in Amazon SES via API. If you are not a developer, look for tools such as Up.
- Suppression list: here you can manage your suppression list. Amazon SES automatically moves all email addresses that you tried to send emails to that resulted in a hard bounce to this list.
- Cross-account notifications: here is where you can manage existing cross-account notifications for bounce, complaint, or delivery.
- Email receiving: where you can set up receipt rules and IP address filters specifying what you want Amazon SES to do with emails it receives on your behalf.
Sending email with Amazon SES
You can send emails with Amazon SES in 4 ways: using the console, using SMTP, using the API, or using a third-party application. Third-party applications such as Up integrate to your Amazon SES account and add a layer of user-friendly features such as list management, email HTML editor, automated email sequences, etc.
In this article, we will focus on sending email from the Amazon SES console.
Email templates in Amazon SES
If you plan to send the same email multiple times using Amazon SES, you may want to start by creating email templates. Unfortunately, email templates can only be created in Amazon SES via API.
If you are a developer, you can read about how to create email template in Amazon SES here. If you are not a developer, consider adopting a tool such as Up, that integrates to your Amazon SES account and offer email templates, among other features that are friendly for non-developers.
Testing and sending email with Amazon SES in bulk
Once you have your email content ready, the next step is to test it before sending it out. If you are using the Amazon SES console, you can use the AWS SES’s mailbox simulator to do that. If you are using Up, this option is also offered before any email goes out. The process is the same as the one described above to send your first email, under the verified Identities option.
The email testing confirms if your email is reaching the recipients’ inbox, but for 1 recipient only. Sending emails in bulk is also possible with Amazon SES, however, only via API. If you are a developer, you can find the instructions on how to do it here. If you are non-technical, our tool Up allows you to manage contact lists and send email templates and automated sequences.
Wrapping up
We hope this tutorial helped you with your AWS SES setup. Now that you are ready to start sending email with Amazon SES in large volumes for a fraction of the price, make sure you check these Amazon SES Best Practices to keep a strong sender reputation and high deliverability.