

Are you ready to start sending emails in high volume without the hustle and high costs? Up can help you in conjunction with Amazon SES. To get started, first you need to create an Amazon SES account and authenticate your domain. This is what this article will run you through.
Creating an Amazon AWS account
The process to create a new Amazon SES account is very straightforward:
- Go to https://aws.amazon.com/ses.
- Click on Get started with Amazon Simple Email Service.
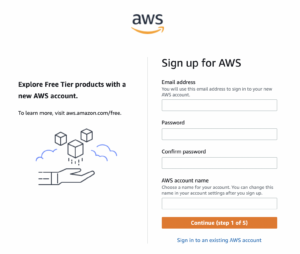
- Complete the 5-step signup process. You will need to enter some information such as your email address or business address. You will also be asked how do you plan to use AWS?” (Business/personal) among other questions.
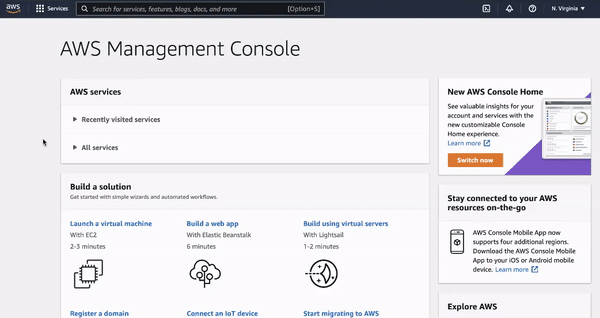
- Once you’ve created your account, you can log into the Management Console.
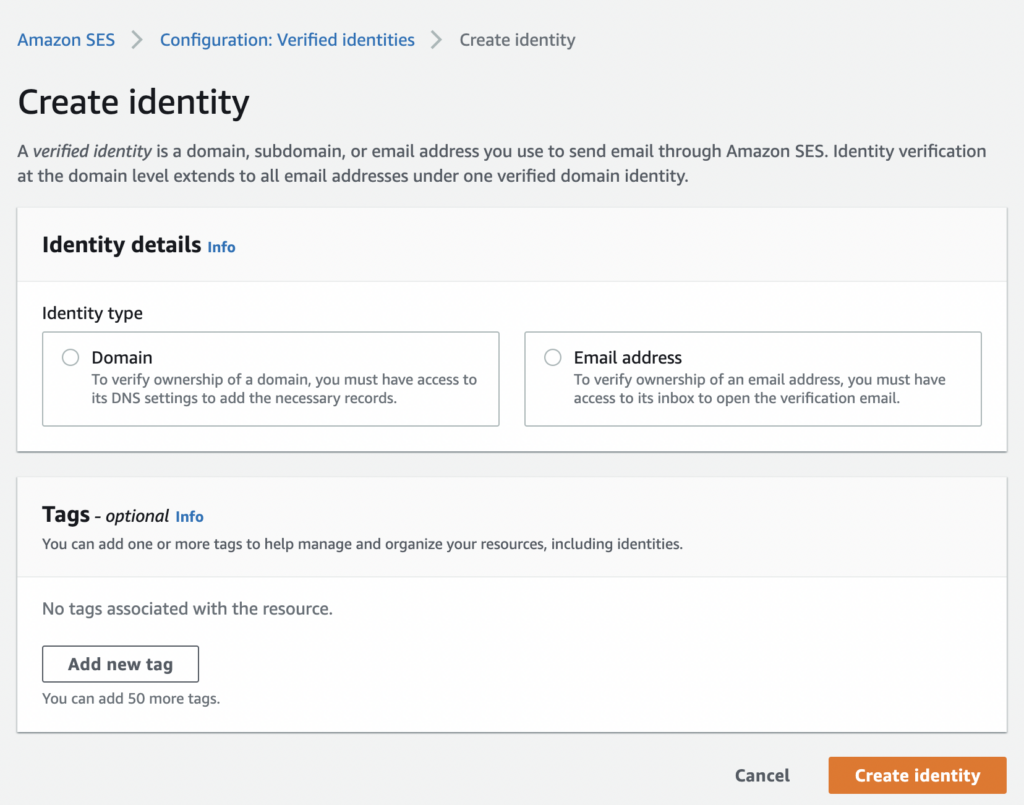
Now that you have created an AWS account, it’s time to start setting up your SES account. From the Amazon AWS console, go to All services > Business Applications > Amazon Simple Email Services to access the SES console.
How to verify a domain
You now need to authenticate your domain(s) so that SES can send emails on your behalf. You can read more about email authentication in Amazon SES here.
First, log in to the Amazon SES console and select Configuration > Verified Identities.
Under the “Identities” column, the unverified domains will have status ‘verification pending’.
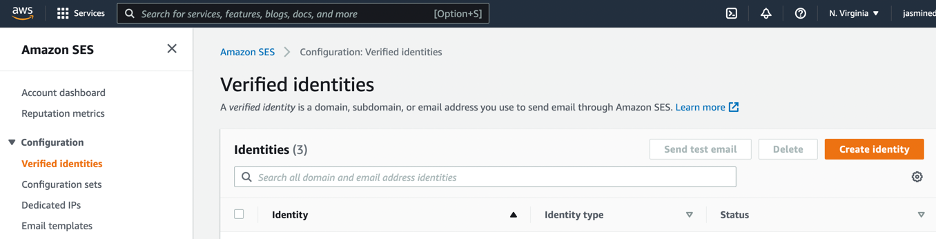
Click on the domain you wish to authenticate (or click on “Create Identity” if you haven’t added any identity yet). Then, scroll down to the ‘Authentication’ tab.
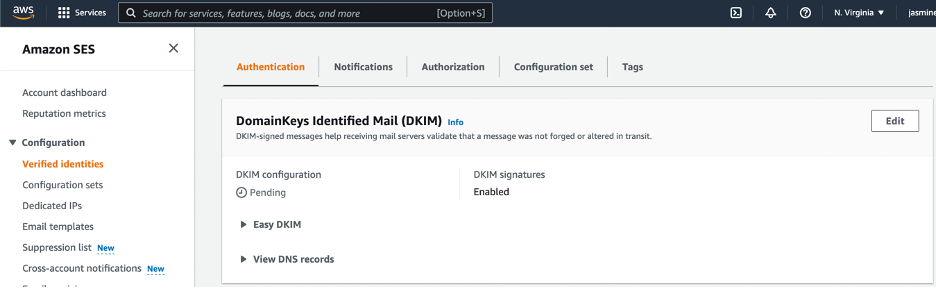
Initially, your DKIM configuration will show the message “Pending“.
Setting up AWS SES DKIM
Under the session ‘View DNS records”, you will find all CNAME records that you have to add to your DNS records, so they match to the Amazon SES ones. Note that the detection of these records may take up to 72 hours (but it’s usually much quicker than that).
Setting up SPF in Amazon SES
When you send email through Amazon SES, the messages that you send pass an SPF check by default. Amazon SES specifies a MAIL FROM domain for each message that is a subdomain of amazonses.com, and the sending mail server for the message aligns with this domain.

To publish an SPF record, you have to add a new TXT record to the DNS configuration for your domain. You can read more info here.
How to verify individual addresses
You can also verify specific email addresses from which you wish to send emails. If you have already verified a specific domain, any email address from that domain will immediately get the “approved” status. Otherwise, follow these steps:
1. From the Amazon SES console, go to Verified identities > create identify > select individual email address.
2. You will get an email from the Amazon SES team to verify your email. Check the inbox for the email address that you are verifying and click the verification link in the email.
3. Back in the Amazon SES Console, in the configuration > verified identities option, you should see “verified” under the Status column if you have successfully verified your email address.
Verifying an Email Address in the Amazon SES API
Alternatively, you can verify an email address using Amazon SES API. First, you need to install and configure the AWS CLI. If you’ve already done this, follow these steps:
- Copy the following text into the command line: “aws ses verify-email-identity –email-address sender@example.com,” replacing sender@example with your chosen email address.
- Copy “aws sesv2 create-email-identity –email-identity sender@example.com” into the command line, also replacing the placeholder email address with the one you want to verify.
- Check your inbox and follow the link to complete the verification steps.
Things You Need to Know About Amazon SES Verification:
- Email addresses are case-sensitive. So, for example, if you verify marketing@EXAMPLE.com, you can’t send an email from marketing@example.com without first verifying the latter.
- The verification status for each email address is tied to the AWS Region. Therefore, if you want to send an email from the same identity but in a different region, you must verify all regions.
Sending a test email
Sending emails with Amazon SES is very easy. The first thing you’ll want to do after setting up your account is to send a test email:
- Navigate to the list of identities under Configuration > Verified Identities. Select the email address with which you would like to send a test email (it must be verified) and select Send a Test Email.

- Choose between the two formats – Formatted (for simple messages) or Raw (more complex emails that involve HTML scripts).
- Fill out the rest of the fields and click send.
- Check your inbox to see if the test was successful
Note that when you first complete the AWS SES setup, your account will be in a test environment called sandbox. This means you are only allowed to send emails from verified addresses to verified addresses.
Related Post: Amazon SES Best Practices
Next Steps
You have created an Amazon SES account, great! Next, you need to link your SES account to Up.