
This article will help you create and manage mailing lists so that you can segment your contacts and send personalized emails to maximize engagement and conversions.
How to create a list
To create a list in Up:
1. Go to the Lists session
2. Click on the Create List button on the top right

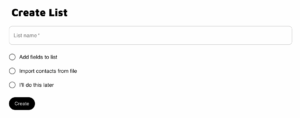
3. Give a name to your list and select between the options below:
- Add fields to list: Select this option if you want to immediately create new fields to your list, beyond the standard fields. The standard fields are Email, First name, Last name, Job title, Company, Phone, Domain, LinkedIn, Unique ID, Tags, Source and Timezone. You can always add custom fields later, you don’t need to do it when creating a new list.
- Import contacts from file: Select this option if you want to immediately populate your list by importing a csv file. You can always import contacts into a list later, you don’t need to do it when creating a new list.
- I’ll do this later: Select this option to just create a list and add fields and/ or import contacts later.
4. Click on the Create button
Adding custom fields to a list
If you selected “Add fields to list” in the previous option, you will be taken to this page. Here’s where you can add custom fields to your lists.
If you haven’t selected “Add fields to list” in the previous option, you can always open this page by clicking on the list name and clicking on the tab Add fields.
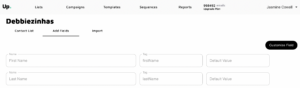
To add custom fields, first click on Customize Field on the top right.
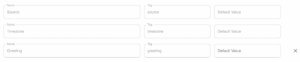
The following popup will load, where you can see all default fields and fill up any new fields you want.
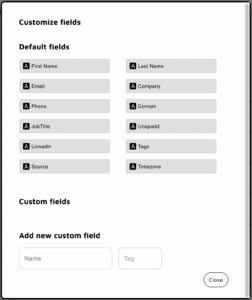
Type the name of the new field you wish to add.
As soon as you type outside the input box, the new custom field will load under the Custom fields session.
To delete a custom field, just click on the “X” on the right side of each field.

After you add your custom fields, they will load on the bottom of the list of fields in the Add fields tab (below the default fields).
They will also contain an “X” next to them, which you can use to delete them.
Similar Post: Amazon SES Best Practices
Adding contacts to a list
If you selected “Import contacts from file” while creating a list, you will be taken to this page. Here’s where you can import contacts to your lists.
If you haven’t selected “Import contacts from file” while creating a list, you can always open this page by clicking on the list name and clicking on the tab Import.
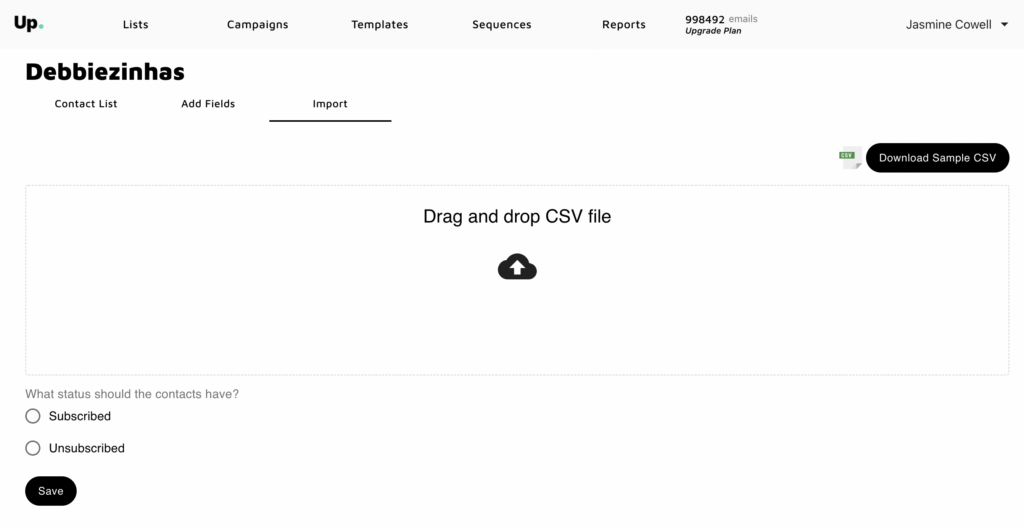
To update a list of contacts to Up:
- Click on Download Sample CSV on the top right to download a template. If you have created custom fields on the previous steps, the downloaded template will already contain the custom fields.
- Add your contacts’ information on the CSV file.
- Drag and drop the CSV file into the designated space or click on the cloud icon to browse files from your computer.
- Select if you want the uploaded contacts to be subscribed or unsubscribed from that specific list.
- Click on save.
How unsubscribes work
All emails that are sent out from Up contain an unsubscribe link at the bottom.
If an email recipient clicks on unsubscribe, that contact will immediately be removed from that specific email list (the contact still may be subscribed to other lists).
Related Post: How to Set Up Amazon SES to Send Emails
You can visualize the number of unsubscribed contacts in a list in your lists dashboard:

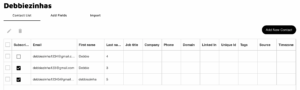
You can also see the detailed list of which contacts are subscribed or unsubscribed by clicking on a specific list:
How to delete a list
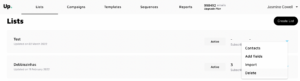
From the Lists dashboard:
- Click on the dropdown button on the right side of the list you want to delete.
- Click on Delete.
Next Steps
Now that you have your mailing lists set up, it’s time to start creating email templates and email sequences. Here’s what our next article is about.