
Start automating your workflow by creating email templates and automated sequences for your campaigns. This article will help you go through this step.
Managing email templates
Up allows you to save email templates so you can send repetitive emails and email campaigns in seconds.
Creating a new template
You can see all your saved templates under the Templates tab. Here’s how you can create new templates:
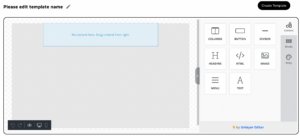
- Click on Create Template button on the top right
- You will be sent to our email editor:
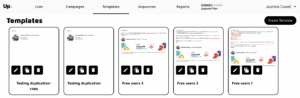
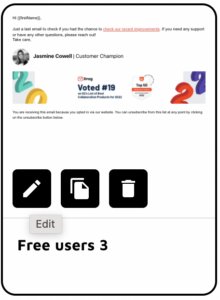
Editing, duplicating or deleting a template
First, go back to the Templates tab to see the list of existing templates.
Then, hover the template you wish to edit, duplicate or delete and click on the respective button to execute these actions.
Managing email sequences
Email sequences are predefined sequences of email templates that are sent in an automated way. This way, you can program automated email follow-ups and focus on what really matters.
Related Post: Best practices for Amazon SES
Creating a new sequence
You can manage email sequences in the Sequences tab.

Here’s how you can create a new sequence:
1. Click on Create Email Sequence button on the top right.
2. You will be sent to our sequences editor:

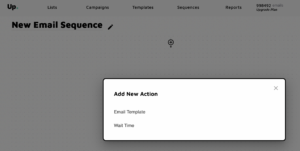
3. Click on the “+” button to add a new action
4. Select if you want to add an email template or wait time
5. Select the template (or the wait time) you wish to add to the email sequence
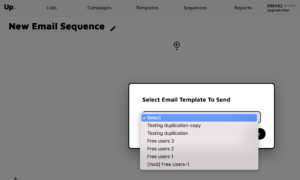
6. The sequences will be auto-saved when you click outside the sequence editor.
If you add an incorrect wait time or template, just click on the incorrect information for the editor view and hit the backspace from your keyboard to delete it.
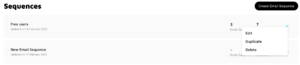
Editing, duplicating or deleting a sequence
First, go back to the Sequences tab to see the list of existing email sequences.
Then, select the dropdown on the right side of the sequence you wish to change and select the desired action.
Sending email campaigns
Everything you need to know to put your email sending on auto-pilot with our email campaigns.
Types of campaigns
There are 2 types of campaigns in Up:
Regular Campaigns: These are one-off campaigns that you can send to existing mailing lists, and emails are sent to one or mailing lists at once. You may want to use this type of campaign for, for example, outreach campaigns.
Automated Campaigns: These are the campaigns running based on new subscribers on mailing lists. For example, in a campaign, you may want to send in a trial-to-conversion sequence, where a sequence of emails go out as new users subscribe to your lists.
Creating a new campaign
You can manage existing email campaigns and create new ones in the Campaigns tab. To create a new campaign:
1. Click on Create Campaign on the top right

2. Select the type of campaign you want to create
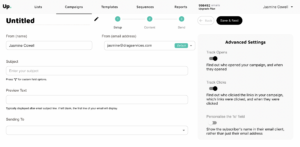
3. Fill up the information about the campaign you want to create:
- “From (name)” field: how email recipients will view the email sender’s name.
- “From (email address)” field: how email recipients will view the email sender’s email address.
- Subject line of the email campaign
- Preview text of the email campaign (the preview text displayed to email recipients after the email subject)
- Sending to: the mailing lists to which you want to send that specific campaign (you can send it to either 1 or multiple lists)
- Advanced settings: Select if you want to track email opens, click opens or personalize the “to” field
4. Click Save & Next
5. Select if you want your campaign to be comprised by a single Email Template or an Email Sequence

6. Select the email template or the email sequence you wish to use
7. Click Save & Next
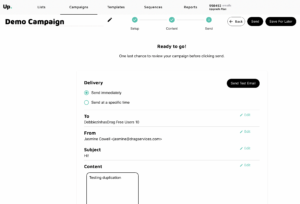
8. Review the details of your campaign and select if you wish to:
- Send Test Email: Select this option if you want to send a test campaign before sending it out to the final email recipients. Note in this option you will receive all emails from a campaign at once, even if it contains wait times. This way, you can assess all emails in a sequence without needing to wait for it. But when campaigns are sent out to final recipients, the wait times will be respected.
- Send: Select this option to send the campaign to final recipients immediately.
- Save For Later: Select this option to save the campaign to be sent later.
Saving a campaign for later
If you decide to save a campaign for later, this is how you can send it afterwards:
- Go to the campaigns tab
- The campaign you saved for later will be displayed with a Draft tag:

3. Click on the name of the campaign you wish to send out
4. You will get back to the same original settings page. Follow the steps and click on Send to send the campaign out.
Next Steps
Now that you have your email templates and sequences ready, it’s time to start sending Amazon SES campaigns out! Here’s what our next article is about.